
Phishing

Phishing Lab⌗
Purpose⌗
This is a lab that has been created for students to simulate a phishing attack on a network. Contained within the lab environment is an SMTP Server and a Web Server. Students will need to provide their own machine to attack off of, and follow the guide provided here to set up the Docker network. These instructions were written for the network to be set up in Kali Linux.
Background⌗
What is phishing? Phishing is a form of social engineering; the goal is to impersonate someone a user may trust in order to gain information about them. There are many forms of phishing; some of the most common forms are: Mass Phishing (emailing as many targets as possible and hoping for a result), Spear Phishing (targeting one specific user, often someone who is seen as powerful, AKA whaling), Smishing (phishing but over text message), and Vishing (phishing over the phone). Phishing is a real problem in the industry. Primarily due to the lack of skill it takes to pull off, and the significant return the attacker may see. The attacker no longer needs to find a vulnerability in a system you have; all they need is one weak link in your personnel. It is also quite tough to defend against; the best way to defend against a good phishing campaign is through training. There are tools that can monitor emails and keep most threats at bay, but as mentioned earlier, this attack doesn’t just have to be in the user’s email. You also cannot defend your users when they are not at work, leaving many gaps in your security. Proving, Social Engineering is truly one of the biggest threats a company can face.
What does this lab entail? This lab gives a basic introduction to how a phishing campaign may work against a company. We will be using a Docker container as our victim. This container will act as the organization we are going after. We will be using an open relay SMTP server (which is hosted on the Docker container) and a phishing website (which will be hosted on our machine). The main goal is to just introduce students to the simplicity of sending a phishing email, not advanced techniques in evading modern defenses, or the art of social engineering itself. In a later lab, I hope to give students a look into defending against phishing campaigns through email security; however, that is not the point of this lab.
What will I need? All you need is a machine to do an attack on, preferably, this is Kali Linux; however, if you can make it work, it can be any machine. The script provided within the Docker Setup tutorial was written for Kali, which is why it is recommended. The tools that will be used for this lab are Python 3 (which should be on your machine by default), Docker (which can be installed using the Docker setup tutorial mentioned earlier), and the Social Engineering Toolkit (which is likely on your machine already; however, instructions for installation will be given later).
Lab Setup:
- Victim
- OS: Fedora 43 Docker Container
- SMTP Server: Postfix 3.10.3-3.fc43
- Web Server: Node 22.20.0-1.fc43
AS ALWAYS, PLEASE DO NOT USE ANY TECHNIQUES LEARNED IN THIS ACTIVITY FOR ANY WRONGDOING. THIS DEMONSTRATION IS FOR STRICTLY EDUCATIONAL PURPOSES. AN ATTACK ON ANY NETWORK OR DEVICE YOU DO NOT OWN IS A CRIME!!!!
Lab Guide⌗
Scope⌗
Our target for this demonstration is Profos-Systems, a technology company that happens to live within our computer. We are after a flag that is very important to use. We know that the founder and owner of Profos-Systems is The Professor. We were able to track down his email as being “professor@profos-systems.com”. We have also found their website. We are pretty sure the flag is on the site, but The Professor is the only one with access to the flag. We need to get his credentials and log on to the Profos-Systems website to get the flag.
While there are many different approaches we could take to do this, we are going to use social engineering, after all, it is probably the simplest method available.
Getting Started⌗
Before we begin our lab, let’s ensure we have everything that we need to be successful. If you haven’t already visited Docker Setup, to get Docker installed and set up for labs. If you are confident in your Docker skills, don’t even worry, just keep going through the lab.
Now with Docker installed, let’s begin checking and installing the dependencies that we will need for this demonstration. As mentioned earlier, we are going to need Python 3 and the Social Engineering Toolkit.
To check if Python 3 exists just run:
python3 --version
As long as a version appears, you have Python 3 on your system already! If, for some reason, you did not have Python 3 installed, just run:
# Ensures your repository indexes are current
sudo apt update

# Installs Python 3

sudo apt install python3
To check if the Social Engineering Toolkit is installed on your system, run:
sudo setoolkit
If this pulls up the Social Engineering Toolkit menu, then you have it installed; if not, just run:
sudo apt update

sudo apt install set
Now we should have everything we need set up and installed on our system!
The final thing we need to do as far as setup is ensure we have this challenge on our machine. To do this, we will just clone the Club-Challenges repository from GitHub, using:
# Pull down the remote repository
git clone https://github.com/weber-cyber-club/Club-Challenges.git

# Change directory into the Phishing Lab repository
cd Club-Challenges/Labs/Phishing/
Building The Docker Container⌗
Building a Docker container is quite simple when you have all the files you need already, which, in this case, we do. Start by ensuring you are in the /Club-Challenges/Labs/Phishing/ directory as described previously and run the following command to build the Docker container (please note it may take some time for the machine to fully build for the first time):
docker build -t phishing-lab .
- -t sets the tag or name of the image we are building (the tag is used to make sure all the Docker images build the same way)
- . sets the context of where the building files for the container are located, in this case, the current directory
If you run:
docker image ls
You should see the “phishing-lab” container image that we just built. We are now ready to run our Docker machine. To run the Docker machine, we just need one command and a few flags:
docker run -d --network challenge_net --name victim-machine phishing-lab
- -d runs the container as detached, which means it will begin running on its own
- –network sets the network we want this machine to reside on, in this case “challenge_net”
- –name gives the machine a name; if you do not set this, it will get a random name (in this case, it is used again to make the machine you build similar to the one used in the lab)
- phishing-lab is the name of the image we would like to run
Now we just need to check if the machine successfully came up. To do this, we would run:
docker ps -a
And look for the victim-machine, it should say up, and listening on ports 25/tcp and 80/tcp

Finally, let’s just check what the IP address of this machine is. To do this, you will run the command:
docker network inspect challenge_net
You should get an output of two different machines (unless you have some from other labs), we are interested in “victim machine”.

As you can see, my victim machine, and likely yours as well, is running on 172.18.0.2, our local machine is .1 acting as the router for this bridged Docker network.
Reconnaissance⌗
As with any cyber operation, we should probably start by taking a look at the target. In this case, the target should be at http://172.18.0.2/. Let’s go to that page and see what we get!
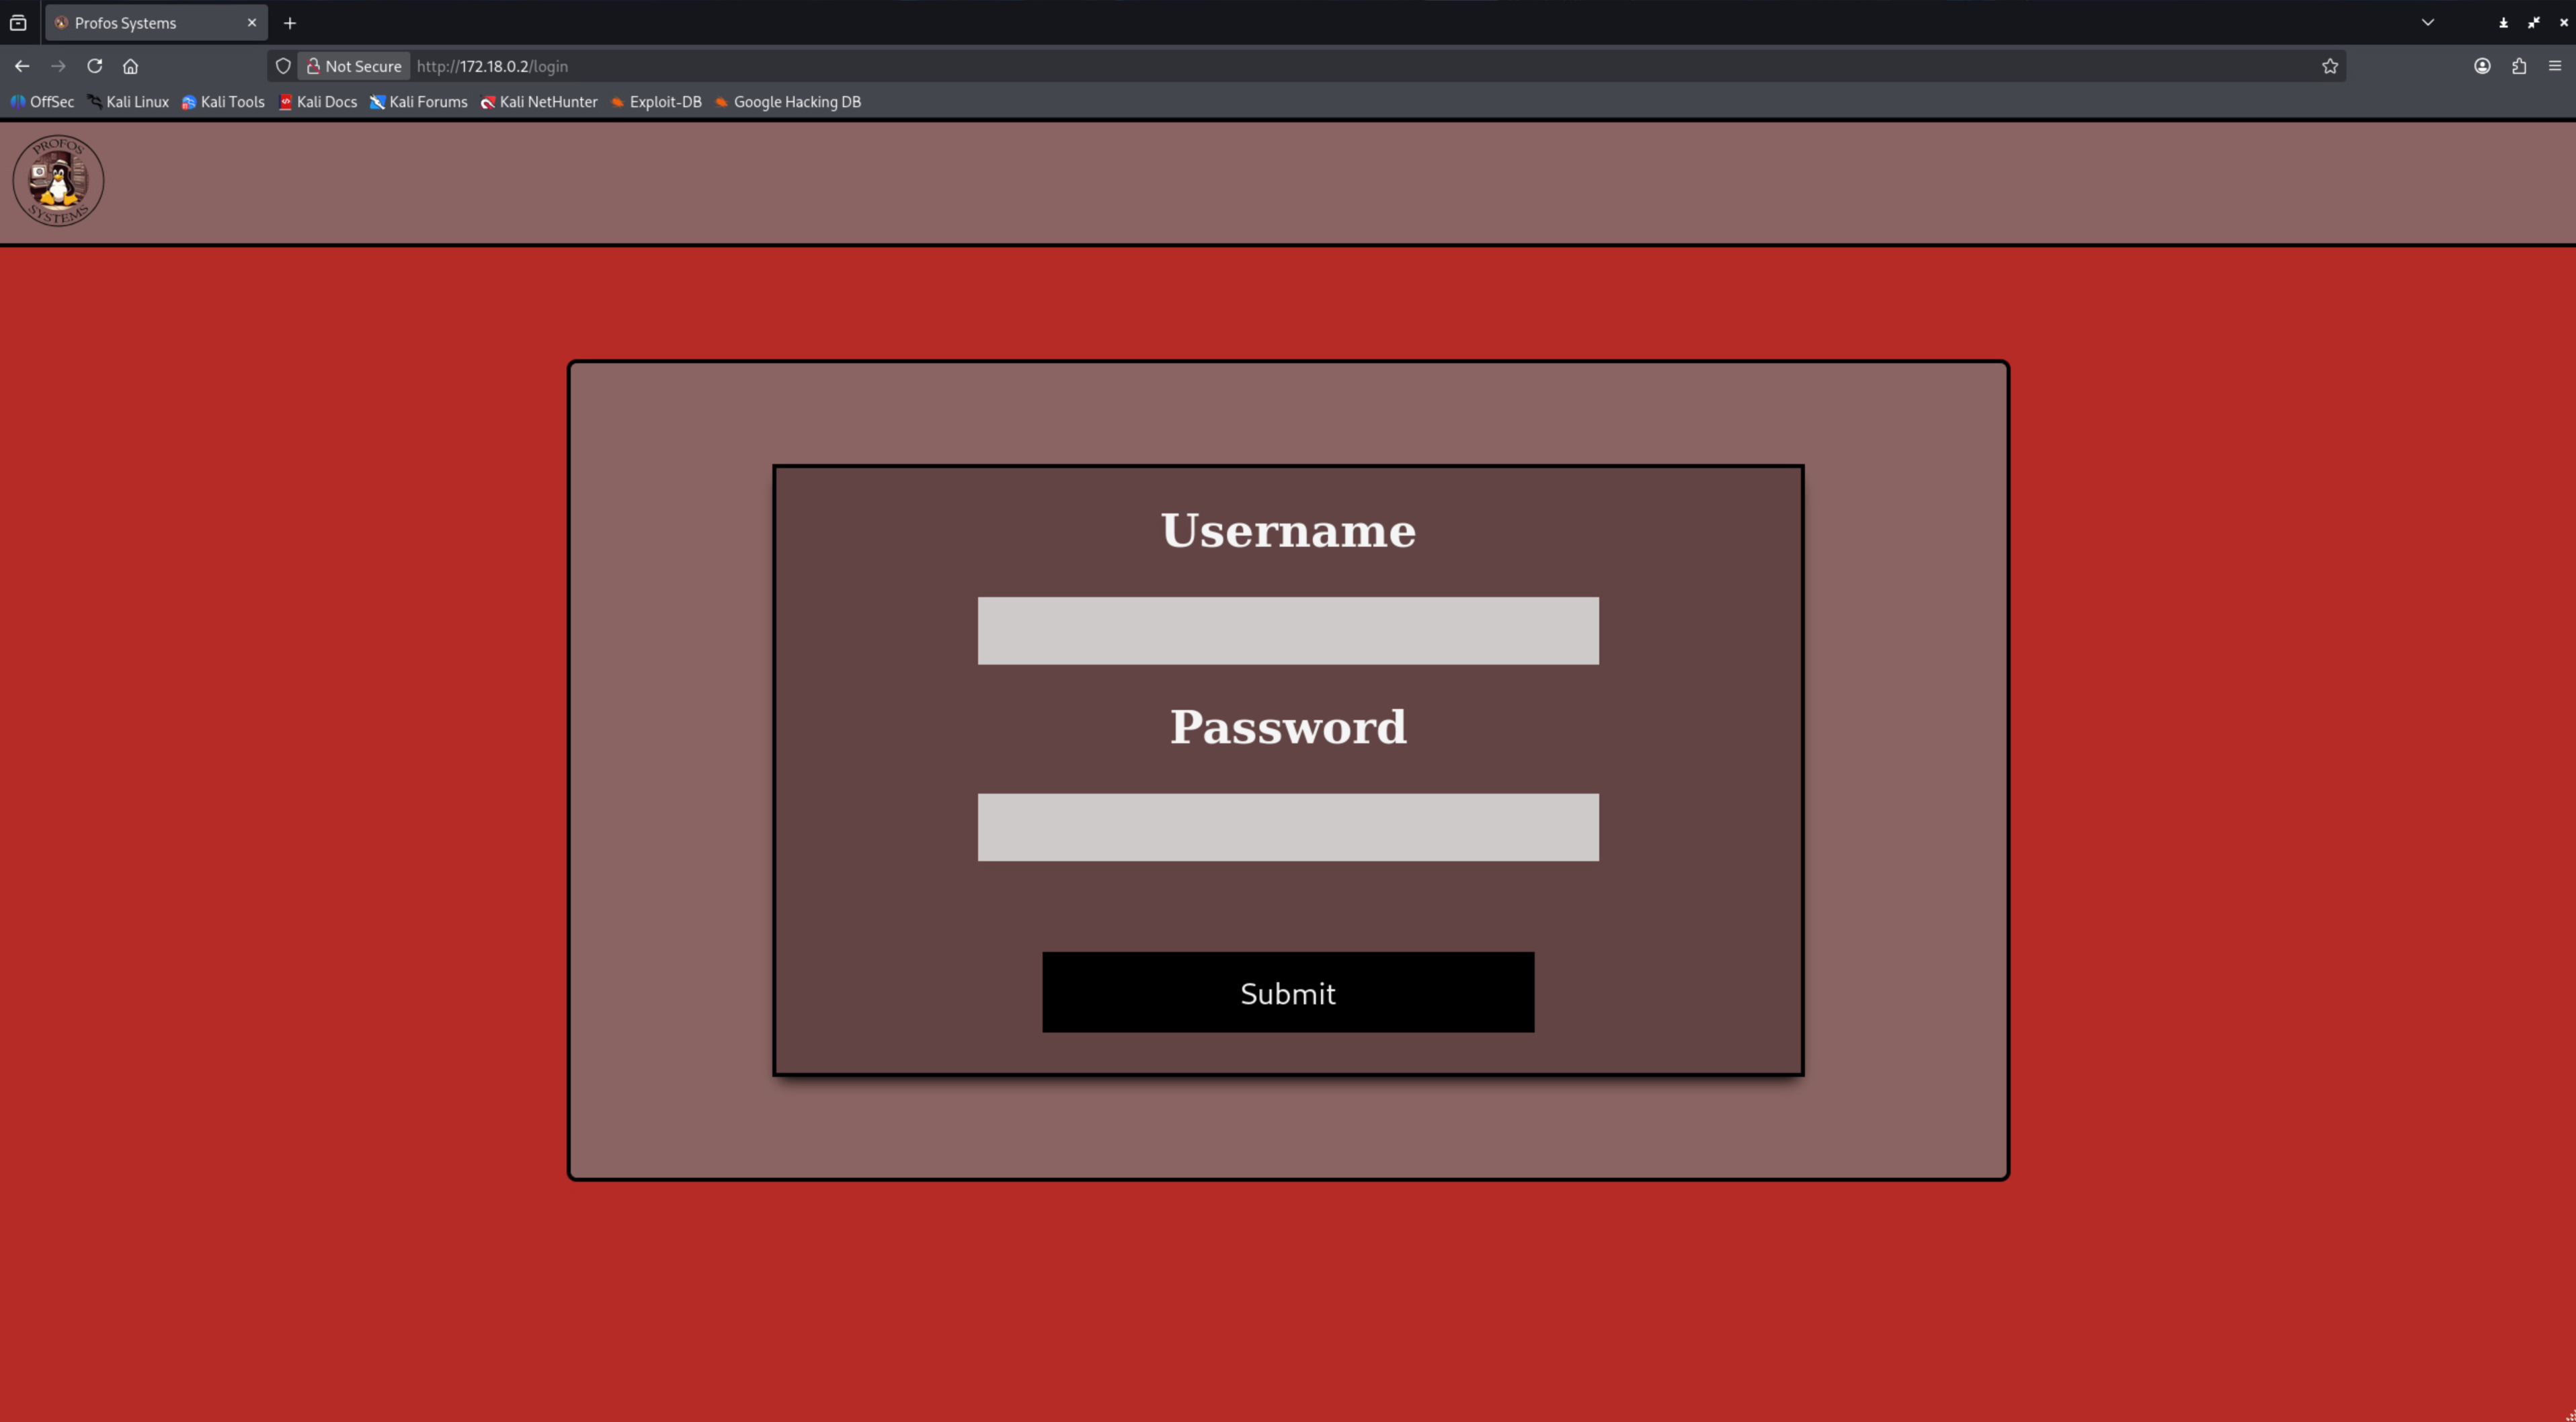
We can see that we get a pretty awesome login page here. Let’s see if we can do some normal attacks on it, try some default credentials like admin:admin.
That didn’t seem to work for us, but we do know of one user at Profos-Systems, and that is Professor! Let’s try “Professor” as a user and maybe “password” for his password.
Professor does need to be capitalized–it is case sensitive
Although we didn’t get the password right, we did reveal something interesting: we no longer see “No User Found” as an error; we get “Password incorrect!” This could be an indicator that we at least have a target to go after.
We can try a few more passwords, but unless you have an amazing guess, you will not get it! So in that case, let’s move on to some more active techniques against Profos-Systems.
Phishing⌗
We could always try to exploit the system that Profos-Systems is using for their web app, or maybe a vulnerability in another server. However, that is not what we’re here for; we are trying to learn phishing. After all, “if you give a man a fish, you feed him for a day; teach a man to fish, and you feed him for a lifetime.”
To begin this journey, we need to understand what we are doing with social engineering. We are attempting to gain someone’s trust who has no business trusting us in the first place. Unless you are super lucky, a user is not just going to hand you over a password if you say, “Hello there, can I please have your password????” This is where a phishing campaign comes into play. It is called a campaign for a reason; it will take some planning and proper execution to work. Let’s start with a very common approach to phishing. We aren’t going to directly ask the user for a password; however, we could use an HTML form to do the asking for us. Now, most users will not fall for a plain, old HTML form; we need to make it believable. What if… we stole the Profos-Systems login page???
One way to accomplish this is using a tool called wget, which is on pretty much all Linux systems by default, which is why I didn’t include it as something we needed to download. However, if you, for some reason, need to install it, just use this command:
sudo apt install wget
And you should be good!
So let’s scrape a website using wget:
wget --mirror --page-requisites --adjust-extension --no-parent http://172.18.0.2/
- –mirror: Turn on options suitable for mirroring. This option turns on recursion and time-stamping, sets infinite recursion depth, and keeps FTP directory listings. It is currently equivalent to -r -N -l inf –no-remove-listing.
- –page-requisites: Turn on options suitable for mirroring. This option turns on recursion and time-stamping, sets infinite recursion depth, and keeps FTP directory listings. It is currently equivalent to -r -N -l inf –no-remove-listing.
- –adjust-extension: If a file of type application/xhtml+xml or text/html is downloaded and the URL does not end with the regexp .[Hh][Tt][Mm][Ll]?, this option will cause the suffix .html to be appended to the local filename. This is useful, for instance, when you’re mirroring a remote site that uses .asp pages, but you want the mirrored pages to be viewable on your stock Apache server. Another good use for this is when you’re downloading CGI-generated materials. A URL like http://site.com/article.cgi?25 will be saved as article.cgi?25.html
- –no-parent: Do not ever ascend to the parent directory when retrieving recursively. This is a useful option, since it guarantees that only the files below a certain hierarchy will be downloaded.
Once this command has completed, we should have a new directory called 172.18.0.2. Let’s change into that directory.
cd 172.18.0.2
If we use the ls command, we can see that we do indeed have the files that we should have.
There is a really cool feature of Python 3, and that is running modules without having to write all the backend code for it. This function is used all the time in cyber, mostly for on-the-fly HTTP servers. While it is not that hard to set up something like httpd, it is much easier to just use one line of code.
To run an HTTP server using Python that will host this site, we just need to run:
python3 -m http.server 80
- -m: run library module as a script
- http.server: creates a Python-backed HTTP server
- 80: binds to port 80
We are going to use port 80 just because it is a little more believable than setting this website up on 8080, which is most of the time where people put servers hosted by Python.
Now let’s check that our HTTP server is running on our machine. We can go to 172.18.0.1 to check, localhost, 127.0.0.1, 127.25.3.48, any interface our computer listens on, seeing the Python server bound to 0.0.0.0, meaning all interfaces.
If we go back to our console that is running the server, we can see all of the things that the client requested from the HTTP server. We are going to need to do a little more work to see what the user is sending us in the post request, however. This is because we are not going to go through and fully rebuild the Profos-Systems website; there is some JavaScript that handles the API endpoints used for the authentication.
What we can do to see the users POST data is use Wireshark to watch the traffic come in. We are going to need to listen on whichever interface is the bridge that was created for Docker. We can run the command:
ip add
And look for the interface that has the IP address of 172.18.0.1.
Once we have this interface, we will open up Wireshark and double-click on the interface that we identified in the previous step.

This will bring us into the adapter that the Docker container should be talking to us on.
We are now prepared to phish The Professor. We know from earlier that the email address that was found for him is professor@profos-systems.com. The Docker victim-machine Docker container has an SMTP server for us to use that has been configured to accept mail from anyone. Therefore, we can use it to send the professor an email. Let’s jump into the Social Engineering Toolkit and begin writing our phishing email.
We will start by running the command:
sudo setoolkit
Which will bring us to a menu screen. On the first screen, we should select option “1” for Social-Engineering Attacks, followed by option “5” for a Mass Mailer Attack. We are only attacking one user, so let’s use option “1”, and we do not want to use a template, so we will use option “2”.
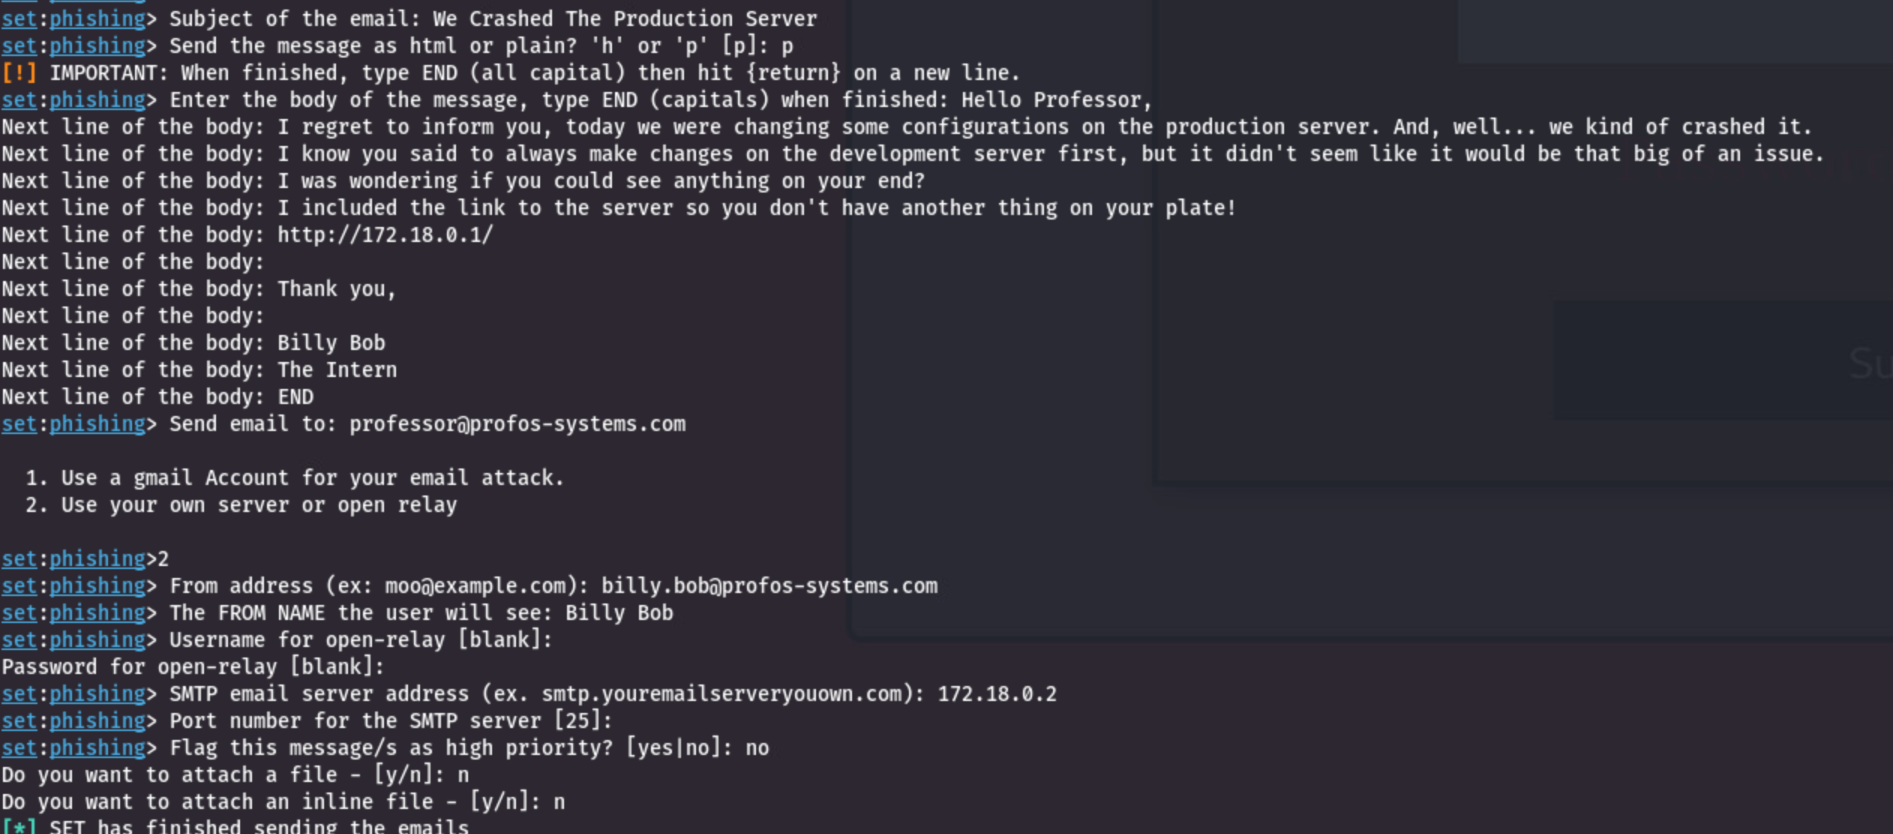
Now we are ready to start writing an email. We want to get The Professor to do something he normally wouldn’t do. One of the best ways to do this is by making things seem urgent. We should use a subject line that would give The Professor a reason to read it and take action! Let’s use the subject line “We Crashed The Production Server”.
Now we will use option “p” as we just want a plain email. Now just write an email that gives The Professor a reason to jump into action, and most importantly, VISIT OUR PAGE!!!!! We need to make sure we have the URL to our page at some point in our email.
Once you have your email written, we need to send it to The Professor, so for the “Email To” field, we need to put “professor@profos-systems.com”, then we need to use option 2: use your own server or open relay. For the front address, we will keep up with the theme of being Billy Bob the intern. Let’s put billy.bob@profos-systems.com and our From Name as Billy Bob. Now, seeing this is an open relay, we do not need a username or password, so we can just hit enter on the next two questions.
The SMTP server should be at 172.18.0.2 and port 25. Just remember back to when we listed out your network information for the Docker network, if you are wondering if your IP address is different. We don’t need to flag this email as urgent (because in the lab, it makes no difference), and we can say no to attaching any files.
This should be our result:
If everything has worked correctly, we can go into our Wireshark again and view the whole SMTP conversation and the POST request from the victim machine.
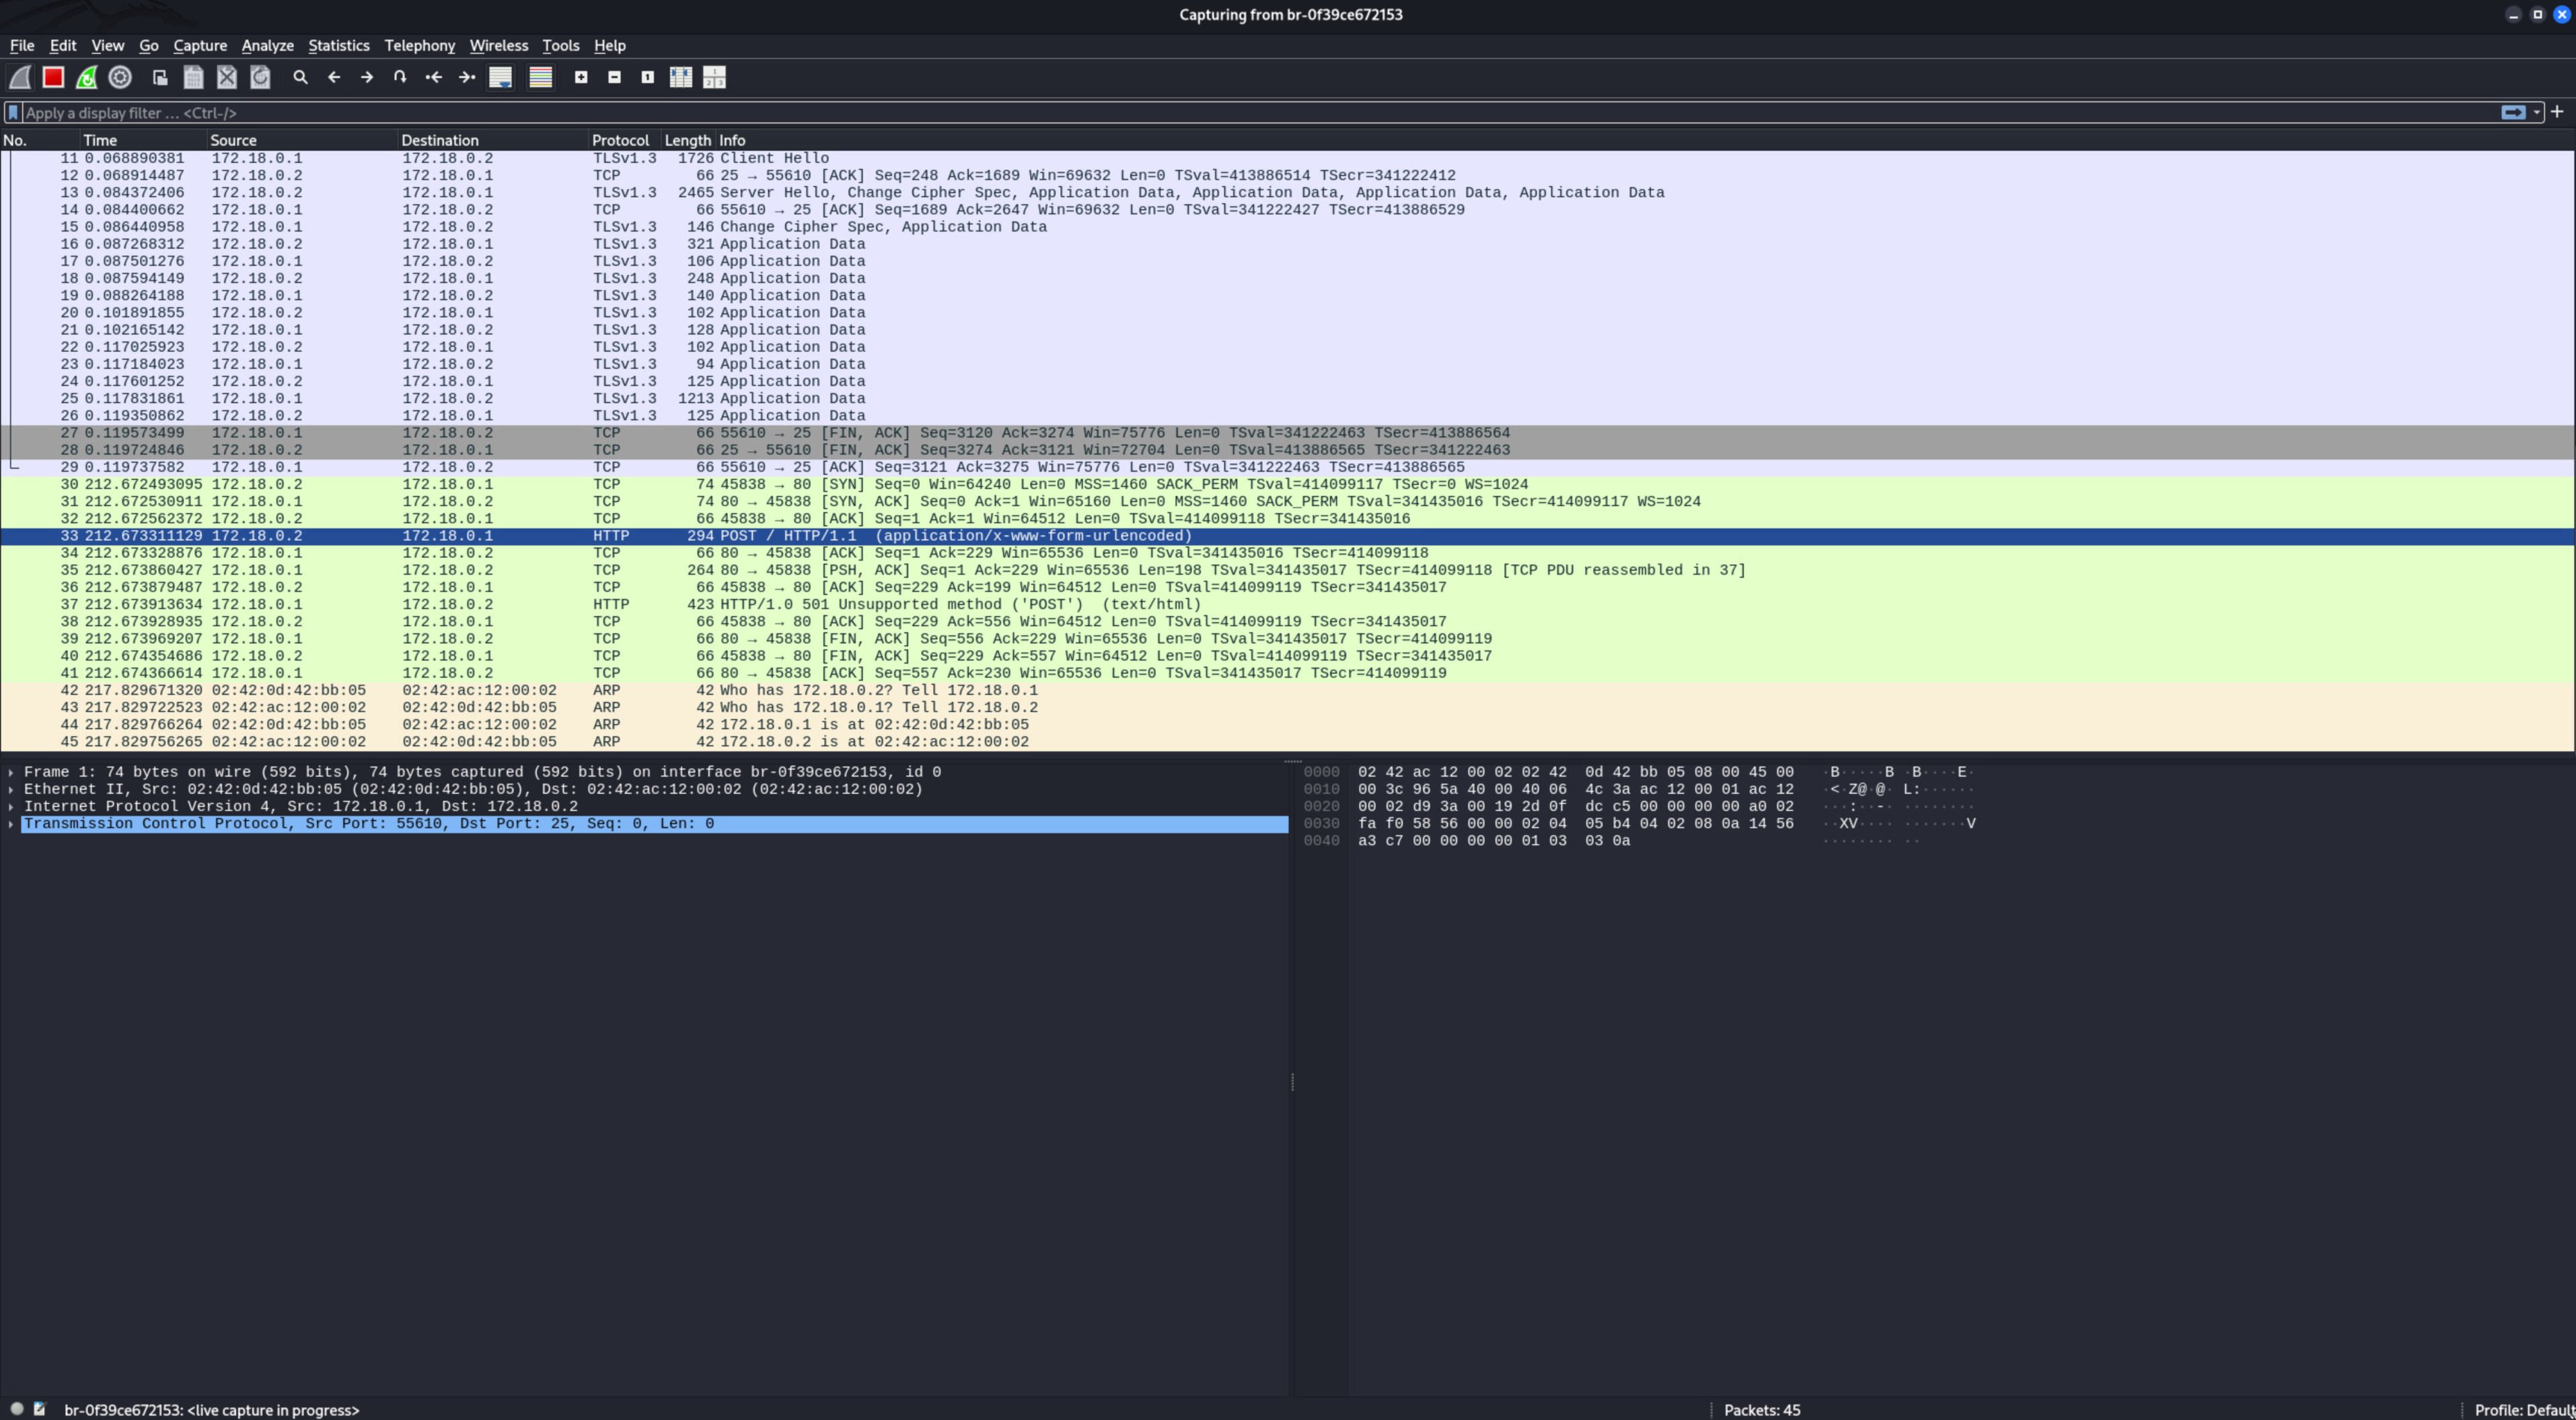
Your job will be to find the username and password from the POST request, go to the victim machine web server, and log in successfully impersonating The Professor, and retrieve the flag that we are looking for! Good Luck!
Questions⌗
Question 1: What is the default port of an SMTP server?
Question 2: What is the username of the user we are trying to Phish?
Question 3: What is the email of the user we are trying to Phish?
Question 4: What is the password of the user we are trying to Phish?
Question 5: What is the Flag found when successfully authenticating as the Phished user?
Conclusion⌗
I hope this gave you a good look into the basics of how phishing campaigns are laid out. While this is far from all of the tactics and techniques used, it is meant more as a warning of the dangers of social engineering. Just think, with a bit more time put into this site, or even the emails, you could make an impressively believable campaign. With that said, from the mindset of a defender, you need to be thinking of how to protect your users. Will you defend them through your own tools? Education? A little bit of both? It is your choice, but remember it can only take one user, making what might seem like a small mistake cost a company potentially millions of dollars in damages. I hope to make more labs in the future, showing more of the defense of phishing attacks, along with many other topics, all of which can be found on the Weber State Cyber Club Website. Thank you for participating. I hope it was a fun lab!
Answers⌗
The answers to the question’s asked within this lab are contained within the Phishing Lab Answer File.
Until Next Time!
The Professor